Thursday, December 18, 2008

Who moved the item to the workflow state?


Applies to Sitecore 6.0.
In the workflow scenarios with "rejection" commands when an item is moved to a previous workflow state, sometimes necessary to notify the user who submitted the item in the first place.
Since Sitecore keeps track of workflow activities and writes everything into WorkflowHistory table, there are also APIs to retrieve such information.
The code snippet below shows how it can be done.

protected override string GetRecipient(WorkflowPipelineArgs args)
 {
    IWorkflowProvider workflowProvider = Context.ContentDatabase.WorkflowProvider;
 
    if (workflowProvider != null)
    {
       IWorkflow workflow = workflowProvider.GetWorkflow(args.DataItem[FieldIDs.Workflow]);
 
       if (workflow != null)
       {
          WorkflowEvent[] history = workflow.GetHistory(args.DataItem);
          if (history.Length > 0)
          {
             WorkflowEvent wfEvent = history[history.Length - 1];
             string fullUserName = wfEvent.User;
 
             if (User.Exists(fullUserName))
             {
                System.Web.Security.MembershipUser mUser = Membership.GetUser(fullUserName);
 
                if (mUser.Email != string.Empty)
                {
                   return mUser.Email;
                }
             }
          }
       }
    }
 
    return string.Empty;
 }

This method can be a part of workflow email action that is associated with the "Reject" command.
Related links:

Don't you just love Sitecore workflow?

Thursday, December 11, 2008

Changing the application pool identity for Sitecore


Though the Sitecore installer does not support Windows authentication yet, it is possible to reconfigure the system manually after the installation.
In production environments where security considerations represent a major concern, using a SQL user as well as having username and password specified as clear text in the connection string might be undesirable.
Production SQL Server boxes generally reside on a different machine that do not have access to the account the Sitecore application process in authenticated. That’s why the same domain user should be used for both Windows authentication on the SQL Server box and the application pool identity on the web server where Sitecore is running.

Here are the steps to configure this:

  1. Find the application pool that your Sitecore is running under. Open Properties and set the identity to the domain user on the corresponding tab.
  2. On the SQL Server box register the domain user and grant security permissions on Sitecore databases for the domain user according to the section “3.7.2 Creating a Database Account for Sitecore CMS Databases on SQL Server 2005” of the Installation Guide.
  3. On the machine that hosts Sitecore add this domain user to the IIS_WPG group.
  4. Adjust the permissions for the IIS_WPG group according to this section of the Installation Guide “3.6 Configuring Folder Permissions”.
  5. Edit the /App_Config/ConnectionStrings.config file and replace the user id and password parameters with the trusted_connection=yes option:
  6. <?xml version="1.0" encoding="utf-8"?>
      <connectionStrings>
        <add name="core" connectionString="Data Source=.\sql2008;Database=Sandbox6_Core;Trusted_Connection=Yes" />
        <add name="master" connectionString="Data Source=.\sql2008;Database=Sandbox6_Master;Trusted_Connection=Yes" />
        <add name="web" connectionString="Data Source=.\sql2008;Database=Sandbox6_Web;Trusted_Connection=Yes" />
    </connectionStrings>
  7. Prepare your identity so it can be used as a service account with “aspnet_regiis.exe” and the -ga switch.
  8. Adjust your global.asax so two methods are executed on Application_Start:
    public void Application_Start()
    {
       System.Security.Cryptography.RSACryptoServiceProvider.UseMachineKeyStore = true;
       System.Security.Cryptography.DSACryptoServiceProvider.UseMachineKeyStore = true;
    }

Notes:
- Anonymous access to the website is still enabled, using the IUSR account. Also the impersonation is still disabled in the web.config as by default.
- ASP.NET cannot send NT credentials over network if SQL server name is resolved using HOSTS file though accessing the same server using NetBIOS name or IP address works fine.

Thursday, December 04, 2008

How to bring a webform to Sitecore desktop


Applies to both Sitecore 5 and Sitecore 6.

If you need to bring a custom built web form (aspx) to Sitecore's desktop, it is pretty easy to do.

First, you need a webform residing under the root of your web site, for example, /forms/testform.aspx.

Then you need to create a reference to this webform from the core database under /sitecore/content/Applications:
app_definition
Just fill out the necessary "Application" field with the relative path to your .aspx (/forms/testform.aspx). Here you can also specify additional parameters such as icon, size of the app, tooltip, etc.
This is the definition of your application.

After this, add a shortcut to the app from either "Bottom", "Left", "Right" or "Programs" menus under /sitecore/content/Documents and settings/All users/Start menu.
In the "Application" field, just put the path to the item containing the definition of your app created previously:
app_reference

That's it! Now you can launch your app within Sitecore Desktop:
 start_menu

result_custom_app

Now if you want to access Sitecore context objects (Items, Database, Fields, etc.) it is recommended to create a custom site for that purpose and associate it with the folder hosting your custom forms:

<sites>
   <site name="shell" virtualFolder="/sitecore/shell" physicalFolder="/sitecore/shell" rootPath="/sitecore/content" startItem="/home" language="en" database="core" domain="sitecore" loginPage="/sitecore/login" content="master" contentStartItem="/Home" enableWorkflow="true" xmlControlPage="/sitecore/shell/default.aspx" browserTitle="Sitecore" htmlCacheSize="2MB" registryCacheSize="3MB" viewStateCacheSize="200KB" xslCacheSize="5MB" />
   ...
   <site name="custom_forms" virtualFolder="/forms" physicalFolder="/forms" rootPath="/sitecore/content" startItem="/home" language="en" database="core" domain="sitecore" content="master" enableWorkflow="true" />
 
   <site name="website" virtualFolder="/" physicalFolder="/" rootPath="/sitecore/content" startItem="/home" database="web" domain="extranet" allowDebug="true" cacheHtml="true" htmlCacheSize="10MB" registryCacheSize="0" viewStateCacheSize="0" xslCacheSize="5MB" filteredItemsCacheSize="2MB" enablePreview="true" enableWebEdit="true" enableDebugger="true" disableClientData="false" />
   ...
 </sites>

After that you can have code like this work: Sitecore.Context.Site.Name

Enjoy!

Monday, September 08, 2008

Controlling Pasting Behavior in RTE


By default, the rich text editor in Sitecore 6 is not prompting you to strip formatting if you are pasting from Word.
This can be configured however to act the way you want.
Just open the file \sitecore\shell\Controls\Rich Text Editor\Default.aspx and set the StripFormattingOnPaste attribute to "None". This will enable the prompt. If you want to have some default clean up actions executed implicitly, just set this attribute to any combination of the values, for example:
StripFormattingOnPaste="MSWordRemoveAll,Css,Font,Span"
This will remove Word formatting and also all inline styling, font and span tags behind the scenes.

More details and documentation can be found on Telerik's website:
http://www.telerik.com/help/aspnet/editor/radeditor-telerik.webcontrols.radeditor-stripformattingonpaste.html

Sunday, August 17, 2008

Department Based Workflow


This applies to version 5.3.x but also can be used with the latest Sitecore 6. Imagine a scenario when you have a multisite or a department-based content tree with micro-sites or department sections sharing the same data template definitions. For example, we have the “Articles” section defined in the both “US” and “France” micro-sites. The articles as items have the same set of fields, in other words, these items are created from the same data template. Also, there is an absolute requirement is to have different workflows assigned to different instances of the articles. For example, for the articles created inside of the “France” micro-site, the workflow will consist of three states and have a unique set of workflow actions and possibly different security. For the “US” articles, the whole workflow configuration will be different.

Friday, August 15, 2008

Direct Link to Preview/WebEdit and Workbox


Sometimes it is handy to give out a link to a business users that will lead to a specific mode in Sitecore. For example, you send out an email notification from workflow using email actions <link to sdn5> and would like to control where the users go after the authentication.
Imagine the following email was sent out from Sitecore with a list of links:
Hello Amy,
The item “About Us” was submitted for approval by user “mark” on Aug 15th 2008. Please login to CMS and review the content using one of the following modes:
WebEdit: http://sandbox531071114/sitecore/login/default.aspx?mode=webedit&sc_itemid=%7b3D1814ED-55DD-4518-BD2C-809393F94D2D%7d
Preview: http://sandbox531071114/sitecore/login/default.aspx?mode=preview&sc_itemid=%7b3D1814ED-55DD-4518-BD2C-809393F94D2D%7d
Workbox: http://sandbox531071114/sitecore/login/default.aspx?mode=workbox
Best Regards, Sitecore CMS
Sending out those links is pretty straightforward, while having Sitecore function according to the scenario requires some adjustments.
The first thing that you should do is add a processor to the “login” pipeline that will perform the dynamic switch between the modes by adjusting the LoginArgs’ StartUrl judging by the “mode” query string you pass in the initial URL:
   1: <login argsType="Sitecore.Pipelines.Login.LoginArgs">
   2:     <processor mode="on" type="Sitecore.Pipelines.Login.LoginCookie, Sitecore.Kernel" />
   3:     <processor mode="on" type="Sitecore.Pipelines.Login.Login, Sitecore.Kernel" />
   4:     <processor mode="on" type="Sitecore.Pipelines.Login.Settings, Sitecore.Kernel" />
   5:     <processor mode="on" type="Sitecore.Pipelines.Login.Ticket, Sitecore.Kernel" />
   6:     <processor mode="on" type="Sitecore.Pipelines.Login.CheckStartPage, Sitecore.Kernel" />
   7:     <processor mode="on" type="SCUSAINC.Web.Pipelines.Login.ModeRedirector, SCUSAINC.Web" />
   8: </login>
   9:  
Depending on the value of the “mode” attribute passed, you can assign one of the following string values:
  • For the Workbox mode - "/sitecore/shell/applications/workbox/workbox.aspx"
  • For the WebEdit mode - "/sitecore/shell/applications/webedit.aspx"
  • For the Preview mode - "/sitecore/shell/applications/preview.aspx"
Since for both WebEdit and Preview you are interested in the redirect to a particular item, you should also pass on the “sc_itemid” query string retrieved from the initial link. So the request will come in to the Sitecore login page with the mode parameter and possibly the sc_itemid parameter as well. After user logs in, the ModeRedirector is called as a last processor and the StartUrl is adjusted accordingly. Then it is all semi-automatic. No matter what mode user selects in the login page options, the query string parameters will always prevail. So if a switch to Workbox occurred, Sitecore will handle this automatically. In case of Preview and WebEdit, the aspx pages do not take advantage of the query string passed to the previous request. In other words, by default, the “sc_itemid” parameter will be neglected. In order to get around this, you can simply override those pages, grab the parameter and pass it on. You can download the package with the solution from here. It contains the code for the ModeRedirector and the overriding code for Preview.aspx and WebEdit.aspx which are located under “/Sitecore/shell/Applications” and also some utility class. I should mention that this was developed on 5.3.1 but with proper adjustments I don’t see any reason why this should not fly on version 6.
Enjoy!

Monday, April 21, 2008

Adding Custom Scheduled Agents


After you get yourself familiar with the logic of Sitecore Scheduler, you may be interested in creating your own custom scheduled agent.

There are two ways of doing that. The most elegant way is to create a "task" and a "schedule" item under the "/sitecore/system/Tasks" in the master database as described in this article. After you create a command referencing a class that you develop and a schedule item to set the timing parameters, the out-of-the-box DatabaseAgent will pick it up on the scheduled basis according to its interval parameter (remember the loop nature of things). By default, there are two DatabaseAgents defined in the system. One is for the "master" database, another for "core". This should be kept in mind since in the staged environments when the content delivery server does not have access to neither core nor master database, you may need to adjust it and change the "database" parameter to "web" as your schedule item definitions should be published anyway.

There is another way to approach the creation of the custom scheduled agents and you may already guessed it. You can simply develop an agent class (see below), compile it and provide the definition of your custom agent to the Sitecore Scheduler by defining it in the web.config:

   1: <scheduling>
   2:   <frequency>00:00:10</frequency>
   3:   <!-- default agents go here... -->
   4:   <agent type="MyProj.MyAgent, MyDLL" method="Run" interval="00:10:00">
   5:     <param desc="myparam">valueofmyparam</param>
   6:   </agent>
   7: </scheduling>

The reference in the "type" attribute should correspond the existing class within existing assembly in the "bin" directory as usual.

The skeleton of any custom agent is shown below. You can dynamically pass different string parameters to your agent:

   1: public class MyAgent
   2: {
   3:     // one string parameter that can be passed from the web.config definition
   4:     private string myparam;
   5:  
   6:     // Constructor
   7:     // Notice that it expects the parameter from the agent definition
   8:     public MyAgent(string myparam)
   9:     {
  10:         this.myparam = myparam;
  11:     }
  12:  
  13:     // A method that is dynamically executed by Sitecore Scheduler
  14:     public void Run()
  15:     {
  16:         // do your processing here
  17:     }
  18: }

Enjoy responsibly.

Sitecore Scheduling Explained


Sitecore provides a framework for the process scheduling out of the box. This functionality is often used in the scenarios when it is important to automate a background process of any sort such as content sync or import, cleanup, etc. So it is critical to understand the underlying logic of this process which is really straightforward, but may be unknown for the newbies.

The Sitecore Scheduler is basically a background process that is started with the sleep interval defined in the <frequency> section.
The skeleton of the <scheduling> section looks like this:

   1: <scheduling>
   2:  <frequency>00:10:00</frequency>
   3:  <agent ...>
   4:  </agent>
   5: </scheduling>

Within the execution of the Scheduler, it queries the inner contents for the agents defined there and adds to the queue only those agents which marked as "due". An agent is considered "due"  if the value of the "interval" parameter is less than the timeframe of the last execution. In other words, if the agent was run 4 minutes ago last time (the frequency is set to 1 minute for example) and the interval parameter of the agent is 5 minutes, it is obvious that it will not run this time. So you may find it convenient to think about the global frequency parameters as an external loop.

An agent is considered disabled if the "interval" parameter is set to zero seconds ("00:00:00").

After the logic is able to retrieve a list of agents marked as "due", each agent is executed as a job process and the last run date is updated.

Here are some examples of what is expected in two different configurations below:

1. The case when "MyAgent" will not be executed each 10 seconds due to the bigger value in the "frequency" parameter. The agent will still be executed each 10 minutes. This is a common configuration issue for the Staging module.

   1: <scheduling>
   2:   <frequency>00:10:00</frequency>
   3:   <agent type="MyProj.MyAgent, MyDLL" method="Run" interval="00:00:10"/>
   4: </scheduling>

2. In this case the MyAgent code will be executed roughly each 10 minutes as specified in "interval" but will be triggered for the "IsDue" check each 10 seconds:

   1: <scheduling>
   2:   <frequency>00:00:10</frequency>
   3:   <agent type="MyProj.MyAgent, MyDLL" method="Run" interval="00:10:00"/>
   4: </scheduling>

Hope this makes sense.

Wednesday, March 26, 2008

Enhanced Lookup Field (continued)


This is an enhancement or continuation of my old post where I was showing how easily you can teach the lookup field to show field values of the source items instead of just name.

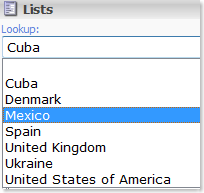
This may be pretty handy in the scenarios with more than one content languages in Sitecore. Let's imagine that we would like to have a lookup field that is used as a "country selector" pulling out those items from the "global" repository:

lookup1

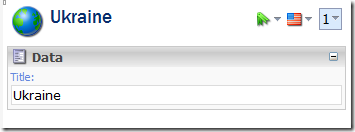
Then let's imagine that we have 2 more content languages besides English in the system (Spanish and Ukrainian) and that our "Country" template that our source items are created from has only one field defined that is not shared across languages and versions called "Title":
lookup2

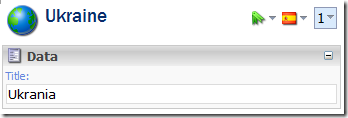
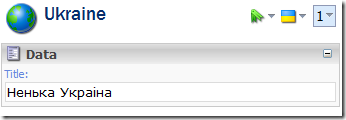
This value is going to be translated into all the languages:
image

lookup3

In other words, the "Title" field will have different values depending on the selected language.

Now it should make a lot of sense to "teach" our lookup field to retrieve those language specific values and show them in the drop down list instead of item names.

In order to do that, we will have to customize the lookup field by inheriting from the default one. The code of the custom lookup field is shown below:

   1: using System;
   2: using System.Collections;
   3: using System.Web.UI;
   4:  
   5: using Sitecore;
   6: using Sitecore.Data.Items;
   7: using Sitecore.Diagnostics;
   8: using Sitecore.Globalization;
   9: using Sitecore.Resources;
  10: using Sitecore.Shell.Applications.ContentEditor;
  11: using Sitecore.Text;
  12:  
  13: namespace SCUSAINC.Shell.Applications.ContentEditor
  14: {
  15:     public class CustomLookup : LookupEx
  16:     {
  17:         // the name of the field that we have defined for the "Template field" template
  18:         private const string sourceFieldName = "SourceFieldName";
  19:         protected string itemlanguage;
  20:  
  21:         protected override void OnLoad(EventArgs args)
  22:         {
  23:             if (!Sitecore.Context.ClientPage.IsEvent)
  24:             {
  25:                 Item contextItem = Sitecore.Context.ContentDatabase.Items[this.ItemID];
  26:  
  27:                 foreach (TemplateFieldItem tfItem in contextItem.Template.OwnFields)
  28:                 {
  29:                     // do the necessary checks
  30:                     if (tfItem.Source == this.Source &&
  31:                         tfItem.InnerItem != null &&
  32:                         tfItem.InnerItem.Fields[sourceFieldName] != null &&
  33:                         tfItem.InnerItem.Fields[sourceFieldName].Value != string.Empty)
  34:                     {
  35:                         // setting the FieldName property that will store the field name of the data source item
  36:                         // that we will consume in the "GetItemHeader" method
  37:                         FieldName = tfItem.InnerItem.Fields[sourceFieldName].Value;
  38:                         break;
  39:                     }
  40:                 }
  41:             }
  42:             base.OnLoad(args);
  43:         }
  44:  
  45:         protected override string GetItemHeader(Item item)
  46:         {
  47:             Assert.ArgumentNotNull(item, "item");
  48:             if (this.FieldName.StartsWith("@"))
  49:             {
  50:                 return item[this.FieldName.Substring(1)];
  51:             }
  52:             if (this.FieldName.Length > 0)
  53:             {
  54:                 if (ItemLanguage != null)
  55:                 {
  56:                     // return the language specific value of the source item's field
  57:                     return Sitecore.Context.ContentDatabase.GetItem(item.ID, Language.Parse(ItemLanguage))[this.FieldName];
  58:                 }
  59:             }
  60:             return item.DisplayName;
  61:         }
  62:  
  63:         // this method is used to retrieve the currently selected content language
  64:         // note that there is no code that sets this value, it is being set from outside by Content Editor
  65:         public string ItemLanguage
  66:         {
  67:             set { this.itemlanguage = value; }
  68:             get { return this.itemlanguage; }
  69:         }
  70:     }
  71: }

This should be compiled and the binary should be copied over to the bin directory. Then you should do two configuration steps and create the field reference in Sitecore:
1. Define the namespace of the control in the <controlSources> section:
<source mode="on" namespace="SCUSAINC.Shell.Applications.ContentEditor" assembly="CustomFields" prefix="custom" />
- the "namespace" attribute  is equaled to the one defined in your class.
- the "assembly" attribute  is obviously the name of the DLL that you compile.
- the "prefix" is something that you define but it will be used in the "field type" item creation step #3 below.

2. Open up "/App_Config/FieldTypes.config" and add the reference to your custom field:
<fieldType name="custom lookup" type="Sitecore.Data.Fields.LookupField,Sitecore.Kernel" />
- the "name" attribute will be the same as the "field type" item name in the last step below.
- the "type" attribute should be the same as above.

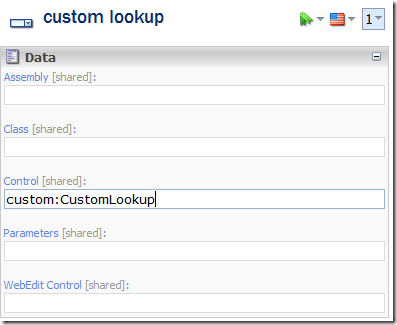
3. Create an "field type" item under "/sitecore/system/Field types". The easiest way to do that is to duplicate the existing "lookup" item and change the "Control" field.
Note that you should name the item as the value of the "name" attribute set on the second step.lookup4
This field will contain the value of the prefix attribute set on the first step and the name of the class that you have previously compiled followed by the colon.

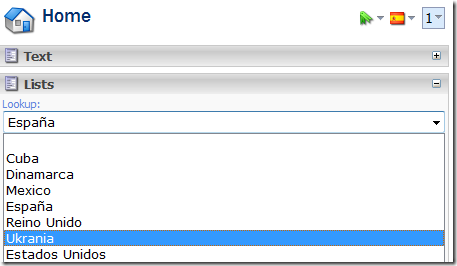
Well, enough boring stuff. Here is the result in Spanish:
lookup5

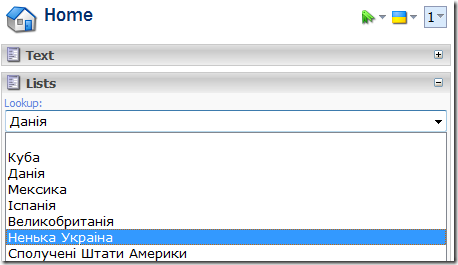
and in Ukrainian:
lookup6

Hope you find it useful.